 how-to
Retaining Wall Construction Best Practices for 2026
Table of Contents
- Retaining Wall Construction Steps: Planning and Site Assessment
- Permits, Codes, and Engineering Thresholds for Retaining Walls
- Retaining Wall Base Preparation: Excavation and Compaction
- Retaining Wall Construction: Laying the First Course and Stacking Blocks
- Geogrid Reinforcement and Backfill in Lifts
- Retaining Wall Drainage: Managing Water and Hydrostatic Pressure
- Retaining Wall Installation Mistakes That Cause Failure
- Cost Planning, Maintenance, and When to Call a Professional
- Frequently Asked Questions
Last Updated: October 6, 2026
Retaining Wall Construction Steps: Planning and Site Assessment
Retaining wall construction starts long before the first block is set. At Santini's Landscape, we've built walls across the Hudson Valley since 2004, and the projects that last are planned carefully from day one.
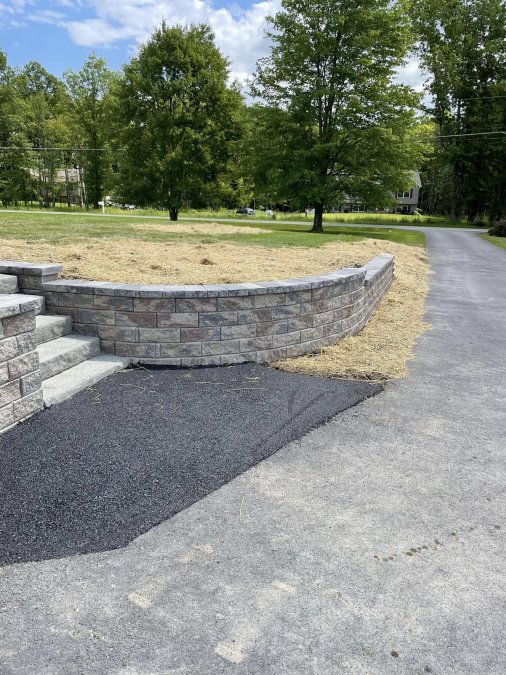
The wall you see is only about 10% of the job, the rest is underground. Below, we walk through the retaining wall construction steps we use on every project.
Measuring Wall Height, Length, and Layout
Measure height, length, and layout before you dig.
- Height: From the base of the trench to the top of the finished wall.
- Length: Run a string line along the full face.
- Layout: Mark the wall line with stakes and string, then check it against your property line.
Keep the wall no taller than 3 feet (about 1 meter) to avoid engineering in many areas; anything taller usually needs a licensed engineer's design.
Checking Soil Conditions and Slope Load
Soil type decides how much support your wall needs. Clay holds water and swells; sand drains fast but shifts easily. A steep slope above the wall pushes harder, and that load grows with every foot of height. Skip a soil check and you can't size the base or drainage correctly.
Permits, Codes, and Engineering Thresholds for Retaining Walls
Most guides tell you to "check local codes" and stop there. Here's the framework we use when we pull permits for clients.
How Height Thresholds Actually Work
There is no single national height limit for retaining walls. Thresholds are set at the state, county, and municipal level, and they stack, a wall exempt in one town can require a stamped design in the next. Most jurisdictions fall into these bands:
- Under 3 feet: Often exempt from permits when the wall is not supporting a surcharge (a driveway, a structure, or a slope above).
- 3 to 4 feet: The most common permit trigger. Many jurisdictions require a permit but not an engineered design at this height.
- 4 to 6 feet: Frequently requires a permit plus a design prepared or sealed by a licensed professional engineer.
These are patterns, not rules. Some jurisdictions measure height from the bottom of the footing, others from finished grade on the retained side, that difference alone can move a wall from exempt to engineered.
What Actually Triggers an Engineered Design
Height is the headline trigger, but rarely the only one. A short wall can still require engineering when any of these apply:
- Surcharge loads: Anything above the wall that pushes on the soil, a driveway, a parking pad, a pool, a shed, or a structure foundation.
- Steep slopes above or below: A slope steeper than roughly 3:1 (horizontal to vertical) above the wall changes the pressure calculation.
- Poor or unknown soils: Clay, expansive soils, fill, or organic material can force a site-specific design.
If any of these apply, assume engineering is in play until your building department says otherwise.
How to Read Your Local Code in 15 Minutes
You don't need the whole code book, just three documents:
- The adopted building code. Most jurisdictions adopt a model code, the International Code Council's building codes publishes the International Residential Code and International Building Code, which many states and towns adopt with local amendments. Find which edition your jurisdiction uses.
- The local amendments. These are where the real numbers live, height thresholds, setback rules, and engineering triggers. Ask the building department for the amendment sheet or the relevant chapter.
- The zoning ordinance. Setbacks from property lines, easements, and height limits on structures are often in zoning, not building code. A wall can pass building review and still violate a setback.
The Three Questions to Ask the Building Department
When you call or visit, ask these in order:
- "What is the height threshold for a permit on a retaining wall, and how do you measure height?"
- "At what height or condition do you require a sealed engineered design?"
- "Are there setback or easement requirements from the property line?"
Get the answers in writing, an email from the department is worth more than a phone memory when an inspector shows up.
When to Bring in a Licensed Engineer
Bring in a licensed professional engineer when any of these is true:
- The wall exceeds your jurisdiction's engineered-design threshold.
- The wall carries a surcharge load.
- The wall retains a slope above it, or sits on a slope below it.
An engineer's stamped plan sizes the base, specifies the geogrid, and sets the drainage detail for your site. Without it, you're guessing on a structure that holds back thousands of pounds of soil. Dreams Set in Stone means building it right on paper first.
Retaining Wall Base Preparation: Excavation and Compaction
Base preparation decides whether your wall stays level for decades or settles within a few seasons.
Excavate a trench deep enough for the base material plus the buried portion of the first course, about 6 to 8 inches on a typical block wall.
Then compact in lifts: add 2 to 3 inches of crushed stone, compact, repeat.
Trench Depth, Width, and Crushed Stone Base
Use this as a starting guide for a standard block wall:
| Element | Typical Spec | Why It Matters |
|---|---|---|
| Trench depth | Base depth + 6-8 in. buried | Prevents frost heave and sliding |
| Trench width | Block width + 12 in. | Room for drainage stone |
| Base material | Crushed stone, angular | Compacts and drains well |
| Compaction | 2-3 in. lifts | Stops settling |
| Base thickness | 4-6 in. compacted | Spreads the wall's weight |
Retaining Wall Construction: Laying the First Course and Stacking Blocks
The first course sets the standard for the entire wall. If it's out of level, every course above inherits the mistake.
Set the first block, check it with a level in both directions, and tap it into the base with a rubber mallet until dead level.
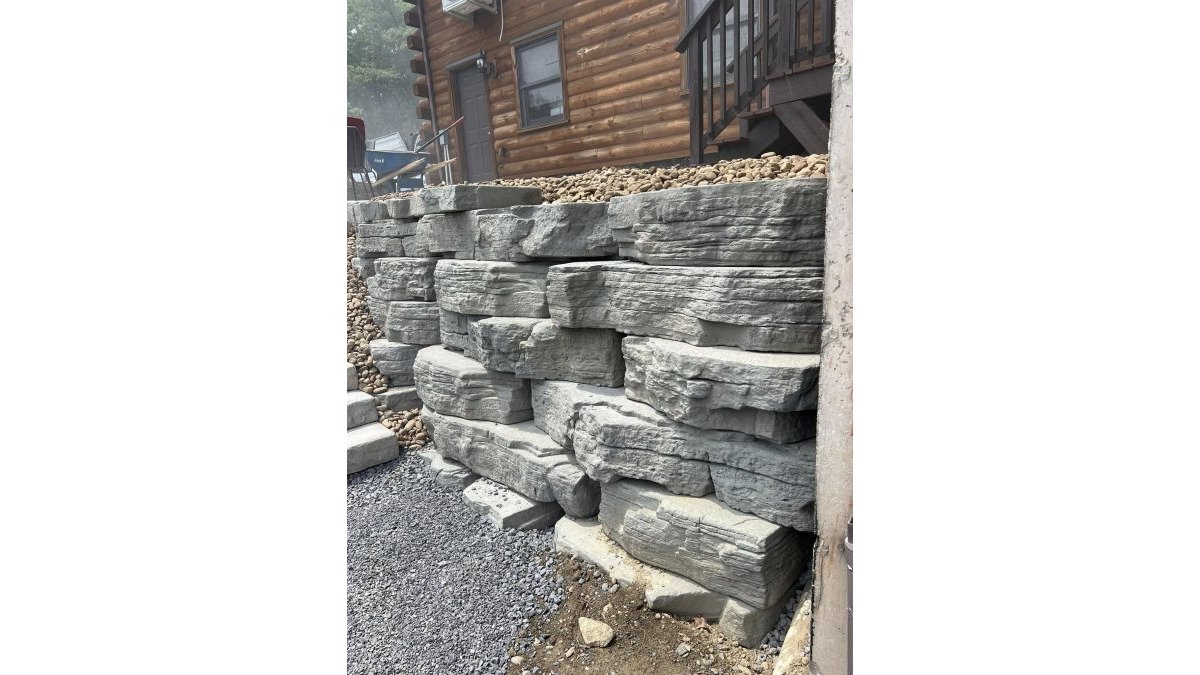
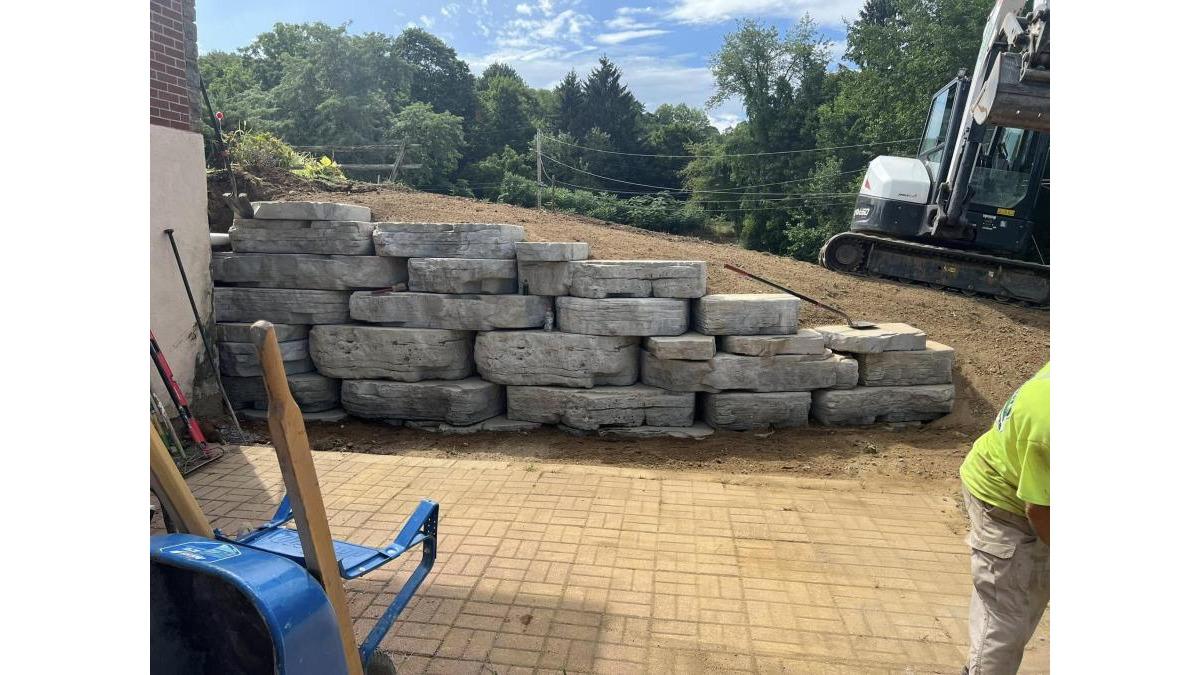
Stack the rest with each course level and the face plumb, offsetting joints so they don't line up course to course, this staggered pattern adds strength.
Geogrid Reinforcement and Backfill in Lifts
Taller walls and walls under heavy load need geogrid reinforcement, a mesh that ties the wall blocks to the soil behind them.
Lay geogrid between courses at the depth your design calls for, extend it back into the soil, and cover it with compacted backfill. Backfill in lifts like the base: add 6 to 8 inches of soil, compact, repeat.
Retaining Wall Drainage: Managing Water and Hydrostatic Pressure
Water is the number one killer of retaining walls. A list of parts isn't a drainage system, what matters is how the parts fit together, where the water goes, and how you know when it's failing.
What Hydrostatic Pressure Actually Does
When water can't escape the soil behind a wall, it fills the voids between soil particles. Saturated soil weighs far more than dry soil, and the water itself exerts lateral pressure against the wall face. That combined force, saturated soil weight plus water pressure, is hydrostatic pressure, and it pushes the wall forward until the water finds a way out.
The Drainage Cross-Section, Top to Bottom
Picture the wall from the side. A properly drained system looks like this, layer by layer:
- Cap and surface grading: The top of the wall and the soil above it should shed surface water away, not toward it. Grade the retained soil to drain away or to a controlled outlet.
- Filter fabric against the soil: A non-woven geotextile between native soil and drainage aggregate keeps fine particles from migrating into the stone and clogging it.
- Drainage aggregate: Clean, angular crushed stone fills the space directly behind the blocks, typically 12 inches wide minimum, the reservoir that collects water and lets it fall.
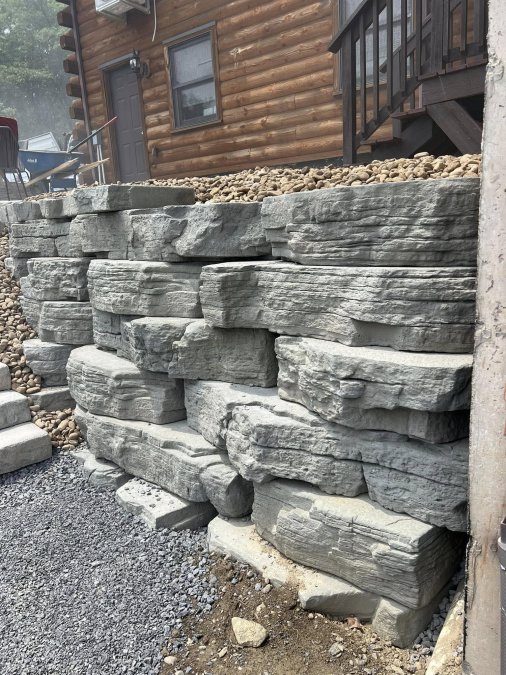
Sizing and Outlet Guidance
Practical rules we follow on installs:
- Aggregate width: At least 12 inches behind the wall face for a standard segmental block wall; wider for taller walls or heavy groundwater.
- Pipe diameter: 3 to 4 inches is typical for residential walls. Match it to the water volume the site produces, a wall at the bottom of a large slope needs more capacity than a small garden wall.
- Pipe pitch: Slope the pipe at roughly 1% (about 1/8 inch per foot) toward the outlet. Flat pipe silts up; backward pitch is worse than no pipe.
Warning Signs That Drainage Is Already Failing
Drainage problems rarely announce themselves, they show up as small symptoms that get worse. Watch for:
- Bulging: The wall face bows outward, usually mid-run, from hydrostatic pressure.
- Leaning: The top tilts forward, often base failure combined with water.
- Water seepage: Water weeping through the face or pooling at the base after rain.
Any of these means the system isn't working. Catching a bulge before the wall cracks is the difference between a drainage repair and a full rebuild.
Why This Is the Step Most Homeowners Underestimate
Drainage is invisible once the wall is done, exactly why it gets skipped, and exactly why it's the most common cause of failure we see on repair calls. A wall with premium blocks and no drainage will fail; a wall with average blocks and a proper drainage system will often outlast it. You Need Santini's to get this detail right the first time.
Retaining Wall Installation Mistakes That Cause Failure
Most wall failures trace back to a few repeat mistakes:
| Mistake | What Happens | The Fix |
|---|---|---|
| No drainage | Hydrostatic pressure builds | Add stone, pipe, and fabric |
| Poor compaction | Wall settles and cracks | Compact in thin lifts |
| No geogrid on tall walls | Wall leans or bulges | Add reinforcement per design |
| Wrong base material | Base shifts | Use angular crushed stone |
| Skipping the permit | Fines and tear-out | Check codes first |
Cost Planning, Maintenance, and When to Call a Professional
Cost planning is where quotes get confusing.
Maintenance is light if the build is right: check the drainage outlet each spring, look for settling or leaning, and keep the cap sealed.
At Santini's Landscape, we focus on one project at a time, so your wall gets our full attention from the first stake to the final cap.
Frequently Asked Questions
What is the 1/3 rule for retaining walls?
The 1/3 rule means the buried portion of each block should be about one-third of the block's height. For a 6-inch block, that means roughly 2 inches sits below the previous course. This setback creates the batter, or slight lean into the hillside, that helps the wall resist soil pressure. Skipping this step is one of the most common retaining wall installation mistakes and leads to leaning walls.
How deep should the base of a retaining wall be?
Trench depth depends on wall height and local frost depth. A common guideline is to bury the first course so 6 to 8 inches of compacted crushed stone sits below it, plus enough depth to reach below the frost line. In colder regions, that can mean a trench 12 to 18 inches deep. Proper retaining wall base preparation with compacted aggregate prevents settlement and frost heave.
Does a 3-foot retaining wall need drainage?
Yes. Even a short wall needs retaining wall drainage. Water trapped behind the wall creates hydrostatic pressure that can push the wall forward or cause blocks to shift. Install a perforated drainage pipe at the base, backfill with clean crushed stone, and wrap the stone in filter fabric. This keeps water moving away from the wall instead of building up behind it.
When does a retaining wall need professional engineering?
Many jurisdictions require a stamped engineered design once a wall exceeds 3 to 4 feet in height, though thresholds vary by state and county. Walls supporting a surcharge load, such as a driveway or pool, often need engineering at lower heights. Check with your local building department before you dig. A professional can assess soil conditions and design reinforcement for walls that exceed the threshold.