 how-to
Why Soil Testing Makes or Breaks a Retaining Wall
Last Updated: October 29, 2026
Quick Summary
Geotechnical soil testing shows how much weight the ground can carry, where groundwater sits, and how the soil behaves under load, so you design the wall for the ground you actually have. It prevents settlement and wall failure, controls project costs before excavation, and guides footing, drainage, and backfill decisions.
- A soil test answers how strong the soil is, where groundwater sits, and whether it will expand, shift, or settle.
- Soft clay or loose fill is over-excavated and replaced with compacted structural material before the first block goes down.
- Testing moves unknowns like rock, a high water table, and unstable fill to the front where they can be planned and priced.
- The investigation follows a site walk, borings or test pits, lab testing, and reporting by an engineer.
- A wall with good drainage can last for decades, while a wall without it is a countdown.
Table of Contents
- What Geotechnical Soil Testing Reveals Before You Build a Wall
- The Benefits of Geotechnical Soil Testing for Walls
- Geotechnical Investigation for Retaining Walls: What the Process Looks Like
- Soil Bearing Capacity for Retaining Walls: The Number That Sets the Design
- Retaining Wall Drainage and Groundwater: What the Soil Test Tells You
- How a Geotechnical Report for Retaining Wall Design Guides the Build
- Common Mistakes We See When Soil Testing Is Skipped
- Request a Free Quote and Start With a Site Evaluation
- Frequently Asked Questions
What Geotechnical Soil Testing Reveals Before You Build a Wall
Geotechnical soil testing is the process of pulling soil samples from a proposed wall site and testing them in a lab to learn how much weight the ground can carry, how water moves through it, and how the soil behaves under load. For retaining walls, that report is the starting point for every build, not an optional extra. The benefits of geotechnical soil testing for walls show up long before anyone breaks ground: you learn what the dirt under your feet can actually hold.
Here is what most homeowners get wrong. A wall looks like a simple stack of blocks. It is really a structure holding back thousands of pounds of soil and water. Get the soil wrong, and the wall pays for it.
A soil test answers three questions before you dig:
- How strong is the soil under the wall base?
- Where does groundwater sit, and where does it go?
- Will the soil expand, shift, or settle when it gets wet?
Skip those answers and you are guessing. Guessing on a retaining wall gets expensive.
The Benefits of Geotechnical Soil Testing for Walls
The biggest benefit is simple: you design the wall for the ground you actually have, not the ground you hope for. A soil report tells your engineer and builder what the site can support. That one document drives the wall's size, its footing, its drainage, and its cost.
Preventing Settlement and Wall Failure
Settlement is the slow sinking or shifting of a wall's base. It usually starts with soil that was weaker or wetter than anyone expected. When the base moves, the wall cracks, leans, or bulges.
A soil test catches that risk early. If the sample shows soft clay or loose fill, we over-excavate and replace it with compacted structural material before the first block goes down. That step costs far less than tearing out a failed wall later.
Watch out: skipping the test to save time is the fastest way to a wall that leans within a few seasons. The repair bill dwarfs the test.
Controlling Project Costs Before Excavation
A soil report is a budget tool as much as a safety tool. It tells us what we are digging into, so we price the job on facts.
Without it, surprises pile up:
- Rock where nobody expected it, which slows excavation
- A high water table that demands dewatering
- Unstable fill that has to be removed and replaced
Each surprise adds labor and material mid-project. Testing moves those unknowns to the front, where they can be planned and priced. Knowing the soil up front keeps the schedule honest.
Geotechnical Investigation for Retaining Walls: What the Process Looks Like
A geotechnical investigation for retaining walls follows a clear sequence, and most residential sites move through it in a few stages. The goal is a small set of soil samples that represent the whole wall line.
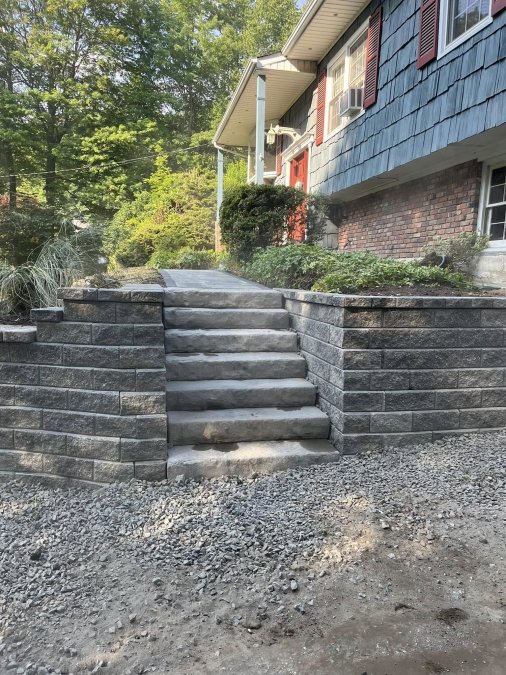
The process usually looks like this:
- Site walk. We review the slope, the drainage patterns, and any existing structures nearby.
- Borings or test pits. A crew drills or digs to sample soil at set depths along the wall line.
- Lab testing. Samples go to a lab to measure strength, density, and water content.
- Reporting. An engineer writes up findings and design recommendations.
The number of borings depends on wall length, height, and how uniform the ground looks. A short garden wall needs fewer samples than a tall wall holding back a driveway.
Here is the sequence a geotechnical investigation follows on a typical residential wall site.
| Step | What happens |
|---|---|
| Site walk | Review slope, drainage patterns, and nearby structures |
| Borings or test pits | Crew drills or digs to sample soil at set depths |
| Lab testing | Samples measured for strength, density, and water content |
| Reporting | Engineer writes findings and design recommendations |
Soil Bearing Capacity for Retaining Walls: The Number That Sets the Design
Soil bearing capacity for retaining walls is the maximum pressure the ground can carry without failing or settling too much. It is the single most important number in the report, because the wall's footing has to spread its load within that limit.
Think of it as the ground's weight rating. A footing that pushes harder than the soil can take will sink. A footing designed around the real capacity stays put.
Bearing capacity varies wildly by soil type. Solid compacted gravel carries far more than soft clay or loose fill. The lab test measures it, and the engineer sets the footing width and depth to match. When the number comes back low, we widen the footing, dig deeper to stronger soil, or both. This is exactly why an engineer belongs on the job.
Retaining Wall Drainage and Groundwater: What the Soil Test Tells You
Retaining wall drainage and groundwater are where most failures begin. Water is heavier than people think, and soil that stays saturated loses strength fast. The soil test shows how fast water moves through the ground and where the water table sits.
That matters because a wall holding back wet soil faces far more pressure than one holding back dry soil. The report tells us whether we need to:
- Add a drainage gravel layer behind the wall
- Install perforated pipe to carry water away
- Route downspouts and surface flow away from the wall
A wall with good drainage can last for decades. A wall without it is a countdown.
How a Geotechnical Report for Retaining Wall Design Guides the Build
A geotechnical report for retaining wall design turns raw soil data into a build plan. It tells the contractor what to excavate, what to backfill with, how wide the footing runs, and how to handle water. Every later decision traces back to it.
A common mistake is treating the report as paperwork for the permit and nothing more. In practice, it changes the job. It might call for over-excavation to reach stable soil. It might set a specific compaction standard for backfill. It might require a drainage detail the crew would otherwise skip.
Following those findings is what separates a wall that lasts from one that needs repair. Following the report's recommendations is what separates a wall that lasts from one that needs repair. See our retaining wall construction best practices for putting those findings into action.
Common Mistakes We See When Soil Testing Is Skipped
The most common mistake we see is building on assumptions. A homeowner or a previous contractor eyeballs the slope, decides the ground "looks solid," and starts stacking. The wall often looks fine for a season or two. Then the cracks show up.
Here is what skipping the test tends to produce:
- Footings sized for guesswork, not real bearing capacity
- No drainage plan, so water builds up behind the wall
- Backfill that was never tested for compaction
- Surprise costs when bad soil turns up mid-dig
If a wall is already showing warning signs, don't wait. Catching them early saves the wall.
Request a Free Quote and Start With a Site Evaluation
The right way to start a retaining wall is with a look at the actual ground, not a phone estimate. A site evaluation tells us what we are working with and sets the project on solid footing. From there, we bring in the testing and engineering the site needs.
Since 2004, Santini's Landscape has focused on one project at a time, using premium materials, specialized equipment, and an experienced team. Customers have described the difference from the first day on site to the final walkthrough. Dreams Set in Stone. You Need Santini's.
Ready to talk about your wall? Request a free quote to start with a site evaluation.
Frequently Asked Questions
Why is geotechnical soil testing important before building a retaining wall?
Soil testing tells you what the ground can actually carry before any block is set. It measures bearing capacity, identifies clay or fill layers that settle unevenly, and finds the water table depth. Without those numbers, a wall is designed on assumptions. A wall built on weak or wet soil can tilt, crack, or fail within a few seasons. Testing lets the contractor size the footing, specify drainage, and set a realistic budget up front, which makes it a sensible first step on any wall project.
What does a geotechnical report for retaining wall design include?
A geotechnical report for retaining wall design typically covers soil classification from borings or test pits, bearing capacity values, groundwater depth, and recommendations for footing size, backfill material, and drainage. It may also flag expansive clay, rock, or buried debris that changes excavation plans. The report gives the contractor and any engineer a shared set of facts to design from, so footing dimensions and drainage details are based on the site rather than a generic template.
How do retaining wall drainage and groundwater affect the design?
Water is the most common cause of retaining wall failure. Saturated soil weighs more and pushes harder against the wall, and freeze-thaw cycles in the Hudson Valley make that pressure worse. Soil testing reveals how deep groundwater sits and how quickly water moves through the soil. That information determines whether the design needs a footing drain, gravel backfill, surface swales, or a combination. A wall designed without that data can hold fine in dry weather and lean after the first wet spring.
When should soil testing be completed before wall construction?
Testing should happen before final design and before excavation begins, ideally during the site evaluation and quote stage. Once digging starts and unsuitable soil is found, changes to the footing or drainage add cost and delay. Completing the geotechnical investigation for retaining walls early lets the contractor price the real conditions, order the right materials, and schedule the crew without surprises. If a property has a history of drainage problems or prior wall failures, test even earlier in the planning process.
A retaining wall only performs as well as the ground beneath it, and the soil test is how you find out what that ground can do. If you want a wall built to last, start with the dirt. Get started with Santini's Landscape and build your wall on facts, not guesses.