 how-to
Landscaping Site Preparation for New Construction
Table of Contents
- Why Proper Site Preparation Matters for Landscaping
- Pre-Work Checklist: What You Need Before Starting
- Step 1: Clear the Site and Remove Construction Debris
- Step 2: Assess Soil Conditions and Run Soil Testing
- Step 3: Address Compacted Soil and Prepare for Grading
- Landscape Grading and Drainage Setup
- New Build Landscaping Checklist and Timeline
- Planning Your Landscape Installation Timeline
- Frequently Asked Questions
Last Updated: October 10, 2026
Why Proper Site Preparation Matters for Landscaping
Landscaping site preparation for new construction is the foundation of every successful outdoor project. Without it, even the most beautiful design fails. Poor site prep leads to drainage problems, settling patios, failed plantings, and costly repairs down the road.
When we start a new build landscaping project, the first question isn't about plants or hardscape materials. It's about what's already there. Construction debris, compacted soil, buried rocks, and grading issues don't disappear on their own. They sabotage everything built on top of them.
This is where Dreams Set in Stone becomes reality. Proper landscaping site preparation removes obstacles, restores soil health, establishes correct drainage, and creates a stable foundation for everything that follows. The work is unglamorous but essential. You Need Santini's because we understand that site prep determines success or failure before a single plant goes in the ground.
Pre-Work Checklist: What You Need Before Starting
Before equipment arrives and digging begins, three critical steps protect your project and your property.
Verify property boundaries and easements
Know exactly where your property ends and where you can and cannot work. Property lines determine where patios, walls, and drainage systems can go. Easements, legal rights others hold on your land, restrict what you can do in certain areas.
Call your local assessor's office or review your deed to confirm boundaries. Many properties have utility easements, drainage easements, or access rights that limit construction. Building on an easement without permission creates legal liability and forces removal later.
Call 811 for utility locating
Before any digging happens, call 811 (or your regional equivalent). This free service marks underground utilities: gas lines, electric cables, water mains, and telecommunications. Hitting a gas line doesn't just stop your project. It's dangerous.
Request locating at least three business days before work begins. Utilities mark their lines with paint and flags. Respect those marks completely. Even shallow work can damage utilities.
Check local permits and stormwater requirements
Many municipalities require permits for grading, drainage work, or hardscape installation. Some areas have stormwater management rules that dictate how water must leave your property. Violating these creates code violations and fines.
Contact your local building department to confirm what permits apply. Ask specifically about stormwater runoff requirements and erosion control. These regulations exist to protect neighboring properties and local waterways.
Step 1: Clear the Site and Remove Construction Debris
The first physical step is removing what shouldn't be there. Construction debris from the home build, lumber scraps, concrete chunks, nails, roofing material, gets cleared. Rocks, stumps, and unwanted vegetation come out. The site is stripped to bare ground.
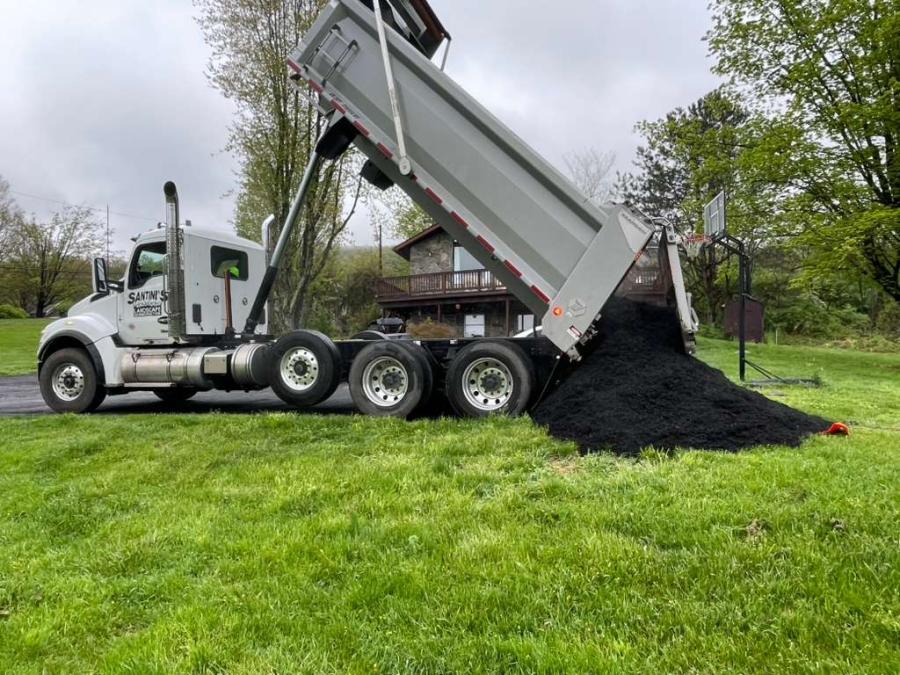
This isn't optional cleanup. Buried debris creates voids that settle later. Rocks create obstacles for grading equipment and planting. Vegetation roots trap water and prevent proper drainage. Clearing establishes a clean slate.
We recommend hiring a professional excavation contractor for this phase. DIY clearing often misses buried obstacles and leaves soil conditions worse than before.
Step 2: Assess Soil Conditions and Run Soil Testing
Once the site is cleared, you need to know what you're working with. Soil testing reveals texture, compaction, pH, nutrient levels, and drainage characteristics. This data guides everything that follows, and prevents costly amendments applied to the wrong problem.
A soil test typically takes 1-2 weeks for results. Send samples to your local cooperative extension office or a private soil lab. This report becomes your roadmap for soil preparation.
What to test and why
Soil texture and composition, The lab measures sand, silt, and clay percentages. If your soil is outside the ideal range for most plantings, you'll need significant amendment or replacement topsoil.
Compaction and bulk density, The lab measures soil density. This threshold tells you whether ripping or deep tilling is necessary before planting.
pH level, Soil pH affects nutrient availability. If your test shows pH outside the preferred range for most ornamental plants and turf, amendments are needed. The lab report will specify how much to apply.
Organic matter and nutrient content, The test measures nitrogen, phosphorus, potassium, and organic matter percentage. Low organic matter means topsoil amendment or compost incorporation is essential. Nutrient deficiencies guide fertilizer or compost selection.
Drainage rate (percolation), Some labs include a percolation test showing how fast water moves through soil. This measurement directly informs whether French drains, swales, or amended planting beds are needed.
Interpreting results and setting acceptance criteria
When the lab report arrives, use these benchmarks to decide what work is required:
- If compaction is moderate (bulk density 1.3-1.4 g/cm³) and texture is acceptable, adding 2-4 inches of quality topsoil and incorporating it into the top 6-8 inches of existing soil improves conditions significantly.
- If compaction is severe (bulk density >1.4 g/cm³), ripping or deep tilling to 12-18 inches is necessary before topsoil addition.
- If organic matter is below 2%, plan to add 1-2 inches of compost or aged manure and work it into the top 6 inches.
- If pH is outside 6.0-7.0, calculate amendment rates from the lab report and apply before planting.
- If drainage is poor (<0.5 inches per hour), plan for French drains, swales, or raised planting beds to manage water.
When we assess a new construction site, soil testing is the first conversation we have with homeowners. You Need Santini's because we interpret those results and build a remediation plan that matches the actual soil conditions, not assumptions. Dreams Set in Stone starts with soil that's been tested, measured, and prepared to support everything planted on top of it.
Step 3: Address Compacted Soil and Prepare for Grading
New construction sites have compacted soil from equipment traffic and building activity. Compaction prevents water infiltration, root penetration, and healthy plant growth. Addressing it is critical for landscape installation success.
If soil testing shows severe compaction, ripping or deep tilling breaks it up. This involves running specialized equipment that fractures soil deep without fully turning it over. The process restores soil structure and drainage capacity.
For moderate compaction, adding quality topsoil and incorporating it into the existing soil improves conditions significantly. Based on your soil test results, amendments like compost, peat moss, or aged manure may be added to improve texture and nutrient content.
Landscape Grading and Drainage Setup
Grading is the art and science of shaping land to move water where you want it. Poor grading creates puddles, wet basements, and erosion. Proper grading protects your home and landscape. More importantly, grading must be verified and documented, not assumed, before finish work begins.
Rough grading to establish slope
Rough grading establishes the overall shape and slope of your property. The goal is simple: water must flow away from the foundation and toward appropriate drainage points. A minimum slope moves water effectively.
Rough grading happens before finish work. Heavy equipment moves soil to create the desired contours. The landscape grading and drainage setup determines whether water pools near your home or flows safely away.
Directing water away from the foundation
Water near your foundation causes basement leaks, foundation cracks, and structural damage. Every landscaping site preparation plan must address this. Grading should slope away from the foundation. Where natural slope isn't sufficient, French drains or swales redirect water.
A swale is a shallow, vegetated channel that directs water. A French drain is a buried perforated pipe surrounded by gravel that collects and moves water underground. Both are common solutions in landscape grading and drainage work.
Finish grading for planting beds and lawn
Finish grading creates the final surface where plants and lawn will go. This is more precise than rough grading. The landscape installation timeline depends heavily on finish grading quality. Uneven finish grading causes settling, poor drainage in planting beds, and lawn scalping during mowing.
Finish grading should be smooth and properly sloped. Planting beds typically sit above surrounding lawn to ensure drainage. Low spots collect water and kill plants. High spots dry out quickly and stress plantings.
Verifying drainage before planting
Don't assume grading is correct, verify it. After rough grading is complete and before topsoil is added, walk the site after a rain or use a hose to observe water movement. Watch where water collects and where it flows. If water pools near the foundation, in low spots, or in planting bed areas, grading needs adjustment before you proceed.
Use a laser level or transit to confirm slope. Measure elevation at the foundation and at a distance away; the difference should be adequate for drainage. Document these measurements in writing. This verification step catches grading problems when they're still easy and inexpensive to fix.
Warning signs of drainage problems
If you observe any of these conditions during or after grading, drainage work requires attention before planting:
- Water pooling near the foundation, Even small puddles indicate grading is too flat or sloping the wrong direction. This must be corrected immediately.
- Soggy or muddy areas in planting beds, Indicates compacted soil, poor drainage, or grading that traps water. Amend soil or install a French drain.
- Water running toward the foundation instead of away, Grading slope is reversed. Regrading is necessary.
- Erosion gullies or rills, Water is moving too fast and eroding soil. Grading may be too steep or lack vegetation to slow runoff. Adjust slope or plan for erosion control plantings.
- Wet basement or standing water in the crawlspace after rain, Indicates foundation drainage failure. French drains or exterior perimeter drainage may be needed in addition to grading.
- Settling or subsidence in graded areas, Soil wasn't compacted properly during grading. Rework the area and compact in 4-6 inch lifts.
When we grade a new construction site, we verify every slope with measurements and observation. You Need Santini's because we don't move forward until drainage is proven to work, not assumed. Dreams Set in Stone means your landscape is built on grading that's been tested and documented to protect your home and your investment.
New Build Landscaping Checklist and Timeline
A structured approach prevents missed steps and costly mistakes. This new build landscaping checklist covers the essential phases from site assessment through planting.
| Phase | Key Tasks | Timeline | Responsibility |
|---|---|---|---|
| Pre-Work | Verify boundaries, call 811, check permits | 1-2 weeks | Homeowner + contractor |
| Site Clearing | Remove debris, rocks, vegetation | 1-2 weeks | Excavation contractor |
| Soil Assessment | Conduct soil testing, receive results | 2-3 weeks | Lab + homeowner |
| Soil Prep | Address compaction, add amendments | 1-2 weeks | Excavation contractor |
| Grading | Rough grading, establish drainage | 1-2 weeks | Grading contractor |
| Finish Work | Finish grading, install hardscape base | 1-2 weeks | Landscape contractor |
| Planting | Install lawn, plants, ornamental features | 1-2 weeks | Landscape contractor |
Planning Your Landscape Installation Timeline
Total timeline from site assessment to finished landscape depends on weather, soil conditions, and project complexity. Fall and spring offer ideal conditions for most landscape work.
Plan for delays. Soil testing results take time. Permits require processing. Unexpected soil conditions (buried concrete, severe compaction) require remediation. Build buffer time into your schedule.
Communication between you, the excavation contractor, and the landscaping contractor keeps work flowing. Each phase depends on the previous one. Rushing site prep to save time creates problems that cost far more to fix later.
We approach every project one at a time, ensuring every detail meets our standards. You Need Santini's because we coordinate all phases, from initial site assessment through final planting, so your landscape installation timeline stays on track and your finished project reflects the quality you deserve. Dreams Set in Stone means your outdoor space is built on a foundation that lasts.
Proper landscaping site preparation transforms a construction site into a stable foundation for beautiful outdoor living. The work happens before anyone sees results, but it determines everything that follows. When you're ready to turn your new construction property into the outdoor space you've envisioned, contact Santini's Landscape for a free consultation. We'll assess your site, develop a comprehensive plan, and deliver the craftsmanship your project deserves.
Frequently Asked Questions
What are the key steps involved in preparing a site for landscaping construction?
Site preparation follows a logical sequence: verify property boundaries and utilities, clear debris and vegetation, test and assess soil conditions, address compaction, establish grading and drainage patterns, and plan the installation timeline. Each step builds on the previous one. Skipping any phase leads to poor drainage, settling, or plant failure. We handle all these phases systematically to ensure your landscaping installation starts on solid ground, literally. You Need Santini's to get this right the first time.
How important is soil testing before landscaping a new build?
Soil testing is critical for soil preparation for new lawn and planting success. Construction often compacts soil and removes topsoil, leaving clay or infertile subsoil. Testing reveals pH, nutrient levels, drainage capacity, and compaction depth. Without testing, you may amend soil unnecessarily or miss serious drainage issues. We use soil test results to determine exactly what amendment is needed, preventing wasted expense and ensuring plants thrive. Dreams Set in Stone starts with knowing your soil.
What drainage problems can occur if site prep is done incorrectly?
Poor grading or inadequate slope allows water to pool near foundations, causing erosion, basement moisture, and landscape settling. Compacted soil prevents water infiltration, creating runoff that damages neighboring properties. Many homeowners face these issues years later and face expensive fixes. Proper landscape grading and drainage established during site prep directs water safely away from structures and into appropriate drainage paths. We verify slope and water flow before any planting or hardscape installation begins.
How long does the full site preparation process typically take?
Timeline depends on site size, debris volume, soil conditions, and weather. We coordinate with builders and utility companies to avoid delays. Our landscape installation timeline accounts for seasonal windows, spring and fall are ideal for planting. We communicate every phase clearly so you know what to expect and when your landscaping installation can begin.