 how-to
Preventing Patio Pavers From Shifting: A 2026 Guide
Table of Contents
- Why Patio Pavers Shift and How to Prevent It
- Paver Edge Restraint Installation: The Key to Locking Pavers in Place
- Best Base Material for Paver Patios: Building a Foundation That Lasts
- How to Repair Shifting Pavers Before the Problem Gets Worse
- Soil, Drainage, and Climate: What Causes Pavers to Move Over Time
- When to Repair vs. Replace: A Decision Framework
- Visual Inspection Checklist for Paver Stability
- Conclusion: Protect Your Investment With Professional Installation
- Frequently Asked Questions
Last Updated: October 2, 2026
Why Patio Pavers Shift and How to Prevent It
Preventing patio pavers from shifting comes down to three things: a compacted base, a locked edge, and water that drains away instead of sitting under it.
At Santini’s Landscape, we have installed patios across the Hudson Valley since 2004. Most failures we see were baked in during installation, not caused by wear and tear.
Pavers sit on compacted base aggregate and sand, with sand filling the joints. That system holds together through friction and interlock.
Frost makes it worse. In our region, the freeze-thaw cycle pushes waterlogged ground up in winter and lets it drop in spring.
Paver Edge Restraint Installation: The Key to Locking Pavers in Place
Paver edge restraint installation is the most overlooked step in patio work. Edge restraint is the border that holds the outer row of pavers in place. Without it, the perimeter spreads, joints open, and the whole field starts to move.
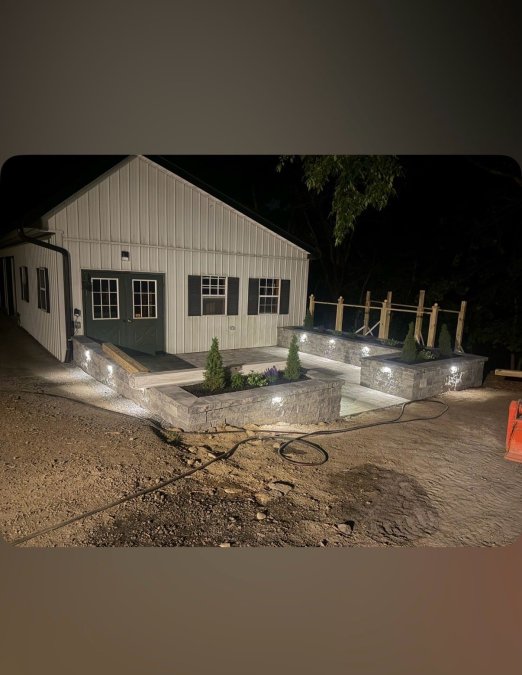
Types of Edge Restraints and Where Each Works Best
Plastic edging is the most common choice for residential patios: flexible, affordable, and good on curved borders.
Concrete border offers the strongest hold. Poured or pre-cast edges resist lateral movement better than anything else, making them a good fit for driveways and heavy-traffic areas.
Aluminum edging sits between the two: durable, clean on straight runs, and rust-free. For patios with a lot of straight lines, it is a strong option.
| Edge Type | Best For | Main Drawback |
|---|---|---|
| Plastic edging | Curved residential patios | Can crack in deep cold |
| Concrete border | Driveways, heavy loads | Higher cost, longer install |
| Aluminum edging | Straight-run patios | Less flexible on curves |
Step-by-Step Edge Restraint Installation
- Excavate the perimeter trench about 4 inches deep and slightly wider than the restraint.
- Compact the trench bottom so the restraint has a firm seat.
- Set the restraint tight against the outer row of pavers.
- Drive landscape spikes every 12 to 16 inches, angled slightly inward.
- Backfill over the restraint and tamp it down.
- Check the border with a level before moving on.
Best Base Material for Paver Patios: Building a Foundation That Lasts
The best base material for paver patios is crushed stone aggregate, typically a mix of coarse and fine particles that compacts into a hard, stable surface. Sand alone shifts under load and washes out; crushed stone locks together when compacted, keeping the pavers above it from moving.
Base Depth and Compaction Requirements
Base depth depends on what the patio will carry. A foot-traffic patio needs less depth than a driveway. In our region, frost depth drives the minimum, because a shallow base will heave when the ground freezes.
Compaction is not optional. Base aggregate has to be laid in lifts and compacted with a plate tamper between each one. Skipping compaction leaves voids that settle later.
A few rules our crew follows:
- Compact in lifts of 2 to 3 inches, not all at once
- Use a plate compactor, not hand tamping, for anything larger than a small walkway
- Keep the base level and consistent, no low spots
- Add geotextile fabric over soft soil to stop it mixing with the stone
How to Repair Shifting Pavers Before the Problem Gets Worse
How to repair shifting pavers depends on what is actually failing. The visible symptom, a rocking paver, an open joint, a dip, rarely tells you which layer gave out. Diagnose the cause first, then repair the layer that failed.
Diagnose the Failure Before You Touch a Paver
Walk the patio and match what you see to what it means:
- Pavers rocking in place, joints tight: the bedding sand has thinned or washed out under those units. The base is usually still sound.
- A whole row along the perimeter spreading outward: the edge restraint has failed, cracked, or was never spiked deep enough. This is an edge problem, not a base problem.
- A saucer-shaped dip in the middle of the field: the base aggregate was under-compacted or too shallow, and it has settled. Water usually pools here after rain.
- Pavers heaved up in one area after winter: water got into the base, froze, and lifted the surface. Look for a drainage or grading issue feeding that spot.
- Sand washing out of joints every spring: the patio is not shedding water, or the joints were never fully filled and compacted.
Perimeter movement and mid-field dips have completely different fixes. Treating one like the other is why repairs fail the second season.
Repairing a Failed Edge
If the outer row is spreading, pull the loose pavers and joint sand. Inspect the restraint: cracked plastic, bent aluminum, or spikes that pulled free all mean replacement, not reuse. Excavate the trench, re-compact the bottom, set new restraint tight to the pavers, and drive spikes every 12 to 16 inches at a slight inward angle.
Repairing a Settled Base
For a contained dip, lift the affected pavers and set them aside in order. Remove the bedding sand and probe the base, if it pushes in easily, the aggregate has lost compaction. Add crushed stone in 2- to 3-inch lifts, compact each with a plate tamper, re-screen the bedding sand, and reset the pavers to the surrounding grade.
Repairing a Drainage Problem
If water is the root cause, fixing pavers without fixing water guarantees a repeat. Check that the patio still slopes away from the house at roughly a 1 to 2 percent grade. Where the yard cannot drain, a French drain, gravel border, or re-grading moves water away from the base. In clay-heavy yards, this matters more than the paver work itself.
Repair or Replace? A Threshold You Can Apply
Use these tests to decide whether to patch or rebuild:
- Repair when movement is confined to one area, the surrounding base probes firm, the edge restraint is intact elsewhere, and the patio was built with adequate base depth to begin with.
- Replace the section when a whole zone has settled, the base is soft across that zone, or the same spot has failed after a prior repair.
- Replace the patio when movement is widespread, water pools on the surface, the original base was too shallow, or you are seeing repeated failures in different areas each year.
If two or more of the replace conditions apply, an inspection before you spend money on a patch will save you from doing the job twice.
Soil, Drainage, and Climate: What Causes Pavers to Move Over Time
Soil composition and climate drive most long-term paver movement, and they are the two factors homeowners control least. They dictate base depth, aggregate blend, drainage design, and even restraint material. Get the soil and climate read wrong and a technically correct install still fails.
How Soil Type Changes the Build
Clay-heavy soil holds water, expands when it freezes, then shrinks as it dries, a cycle that pumps the base aggregate and opens joints from below.
Sandy soil drains fast but shifts under load and erodes at the edges.
Silt and mixed soils behave unpredictably, holding water like clay one season and draining like sand the next.
How Climate Drives Base Depth and Drainage
In regions with a hard freeze-thaw cycle, water in the base freezes, expands, and lifts the surface; when it thaws, the ground drops.
In hot, dry climates, the opposite problem shows up: soil shrinks and settles, and pavers can drop at the perimeter. There, consistent base compaction and a restraint that resists lateral movement matter more than frost depth.
Drainage Is a Site Issue, Not a Paver Issue
Water that pools under a patio softens the base and speeds up settling. A patio should slope away from the house at a slight grade so water runs off. Where the ground cannot drain, a French drain or a gravel border helps move water away. If your yard has had drainage problems for years, that is a site issue, not a paver issue.
Matching Restraint to Soil and Climate
- Clay-heavy, freeze-thaw: concrete border or heavy-duty aluminum restraint, geotextile fabric over the subgrade, deeper base, positive drainage.
- Sandy, load-bearing: concrete-set or deeply spiked restraint, deeper compacted base, edge stabilization to stop lateral creep.
- Mixed or unknown soil: soil evaluation first, then choose restraint and base spec to match the worst conditions on the site.
- Hot, dry, shrink-swell soil: rigid restraint and consistent compaction to resist perimeter drop.
When to Repair vs. Replace: A Decision Framework
Repairing makes sense when the problem is contained; replacing makes sense when the base or drainage has failed across the whole patio.
Repair if:
- Only a few pavers have moved or sunk
- The base under the affected area is still firm
- The edge restraint is intact
- The patio is under 10 years old and was built correctly
Replace if:
- Pavers are shifting across large sections
- Water pools on or around the patio
- The base was too shallow to begin with
- You are seeing repeated failures after prior repairs
If you are not sure which side you fall on, get an inspection before spending money on a repair that will not last.
Visual Inspection Checklist for Paver Stability
A quick walk-around twice a year, after winter and again in late summer, catches most problems before they get expensive.
- Look for pavers that rock or sound hollow when stepped on
- Check the perimeter for gaps between the edge and the pavers
- Scan for dips or low spots where water collects
- Inspect joints for missing or washed-out sand
- Look for cracks in the edge restraint
- Check that the patio still slopes away from the house
- Note any weeds pushing up through joints, a sign of open gaps
If you find two or more of these, it is worth a professional look. Small fixes now cost far less than a full rebuild later.
Conclusion: Protect Your Investment With Professional Installation
Every paver patio faces the same pressures: shifting soil, freezing winters, and water that wants to sit where it should not.
At Santini’s Landscape, we handle excavation, base prep, and installation ourselves, one project at a time so nothing gets rushed. Our team uses premium materials and specialized equipment to get the base and edge right the first time.
If your patio is already shifting, or you are planning a new one and want it done right, we can help. You Need Santini’s. Request a free quote and we will walk your site, flag any drainage or soil issues upfront, and give you a clear plan before work begins.
Frequently Asked Questions
Do I really need edge restraints for my paver patio?
Yes. Edge restraints are the single most effective way to prevent lateral movement. Without them, pavers along the perimeter will spread outward, especially under freeze-thaw cycles common in the Hudson Valley. Plastic edging secured with landscape spikes or a concrete border keeps the entire system locked together. Skipping this step is one of the most common causes of paver failure we see on repair calls.
Is polymeric sand enough to stop pavers from shifting?
No. Polymeric sand fills joints and blocks water and insects, but it does not address the root causes of movement: a weak base, poor compaction, or missing edge restraint. Think of joint sand as a finishing layer, not a structural fix. If the sub-base is not compacted properly or the edges are not restrained, pavers will still shift regardless of how much polymeric sand you apply.
How deep should the base be for a stable paver patio?
For most residential patios, a compacted base of 4 to 6 inches of crushed aggregate is the minimum. In areas with clay-heavy soil or poor drainage, 6 to 8 inches may be needed. The base must be laid in lifts and compacted with a plate compactor, not dumped in one pass. Proper sub-base compaction is what prevents settling and keeps interlocking pavers stable for years.
What is the best way to keep patio pavers from moving?
The best approach combines four things: a properly compacted base of angular aggregate, geotextile fabric to separate soil from base, a secure edge restraint system, and correct joint sand. Each layer supports the next. When one is missing or done poorly, the whole system weakens. We install every patio with all four because preventing patio pavers from shifting starts long before the first stone is laid.